After a recent family vacation, I had lots of pictures from our trip and was wondering what I could do with them besides just put them in frames. I searched around a little and found a great, inexpensive craft – a Mod Podge photo transfer tote bag!
Materials
Instructions
Take the digital file you have of your photo and print it out on your home printer. If you have a physical photo scan it into your computer or have it scanned in at your local drugstore. Do not use a real photograph with the Mod Podge Photo Transfer – it won’t work and you’ll ruin your photo.
Before printing out your digital file, be sure that you or your drugstore have reversed/flipped your images if there are any words in the pictures. If you don’t your transfer will show up on the bag backwards. You can use Canva to reverse your images if you don’t have a program on your computer to do it.
Trim your image to the size you want. I chose to leave the white grids around my collage (which I also created on Canva using multiple images).
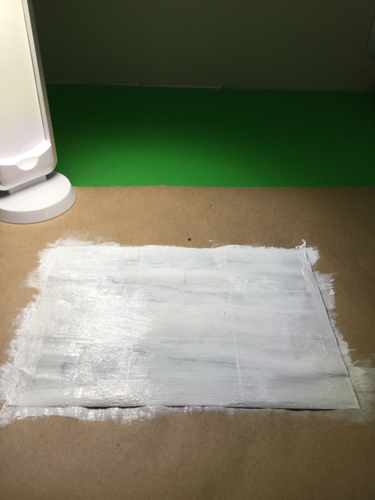
Cover your work area with paper and slip a piece of cardboard inside the bag. Place your printed photo on the covered work area with the images face up. Use a foam brush to completely cover the printed photos with Mod Podge Photo Transfer. Make sure that you can’t see any of the photo under the photo transfer and that you’ve covered all the edges.

Using something to lift the printed photo (such as a pair of tweezers), lift it off the paper protecting your workspace. Taking your time, lay the covered images face down on the bag where you want it. Do this carefully – once it’s down it can’t be moved.
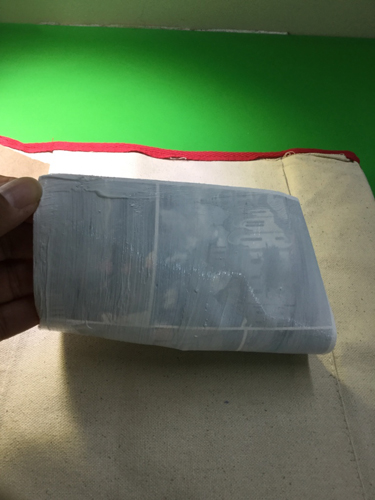

Gently rub all of the bubbles out of the paper and make sure that all of the edges are completely sealed. Rub off any Photo Transfer glue that oozes under the edges.
Leave the paper to dry for at least 24 hours. If you live in a humid climate give it more time. We’re based in Florida so I let mine dry for a day and a half. When the glue has dried you'll be able to the photos clearly through the back side of the printout.
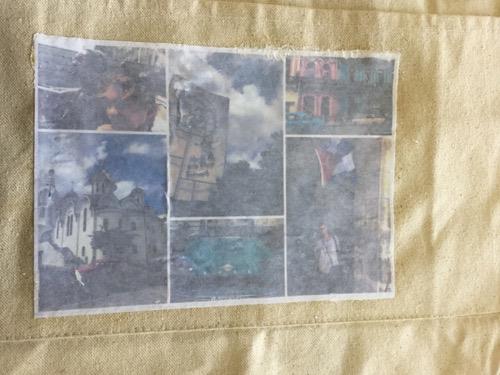
Next you need to remove the paper from the transferred photos. Fill a cup with water. Take another foam brush, dip it in the water and start soaking the paper the printed photographs are on. Don't worry about getting it too wet. After the paper was soaked for a minute or so, take the foam brush or your finger and start moving in circles to remove the paper. Don't rub too hard or you could remove the transfer. Do this in small sections around the paper and you'll start seeing the photos appear. Note that your pictures will look a little distressed as they're revealed.
Below are some images as more and more paper was removed. You can see the images start appearing brighter as more is removed.


Take your time removing the paper. If you think you've removed all the paper let it dry it a little. You may notice that after it's started to dry you still see some remnants of paper. Just wet the sponge and start rubbing gently again.
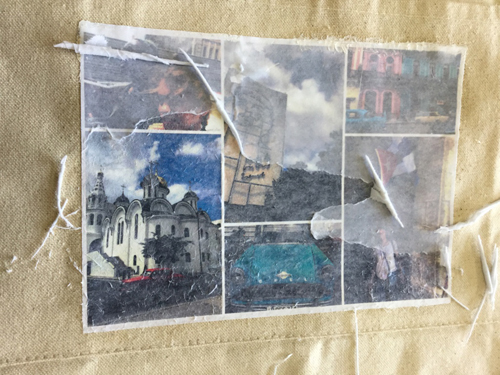
Once you have all the paper removed, let the bag dry for 72 hours. If you've used a canvas bag, you can seal the image with Mod Podge Satin. To wash bag follow instructions on the photo transfer container.
This bag would make a great Mother's Day present! You can also use the same steps to put images on tea towels, t-shirts or a canvas to hang on the wall.

You need to
login to comment.