When was the last time you wrote a letter? Not email, not an IM, not a Facebook wall post. I mean a real, tactile, pen-and-paper letter?
The art of the personal letter used to be taught to young boys and girls in grammar school—now it’s about as common as making macramé hanging baskets for indoor plants. Which is a real shame, because who doesn’t love getting a letter in the mail? And really, don’t you think the postman gets bored of delivering Valu-Paks and cable bills? I would.
With those thoughts in mind, I decided to write letters to all my far-away peeps. I missed each friend a little less as I finished her letter, because in a way I’d brought her closer. It was like sitting down to a friendly chat—I was the only one talking, but I could hear my pals’ responses, gasps and chuckles. When it came time to drop the hand-scribed communiqué into a plain envelope, though, I paused. The stark white envelope was so impersonal. It was a proper receptacle for bills, legal notices and sweepstakes. My friends’ letters were worth more than that bland business-sized envelope. If the letters were personal, why not make the envelopes personal too?
I snagged these instructions from
Kitschy-Koo and slightly modified them:
Handmade Envelope
Supplies:
1. Paper (Scrapbooking paper, old magazines, wrapping paper, maps, or newsprint. Get creative with your paper!)
2. Scissors
3. Glue stick or double-sided tape
4. Envelope template
5. Ball point pen
6. Bone folder (optional, but helpful for making crisp folds)

1. Carefully open an envelope you like the shape of, or download one. This is your envelope template. Trace the template onto your paper, and cut out. **Be sure to flip your cut-out envelope over before folding and gluing so your favorite side ends up on the outside.
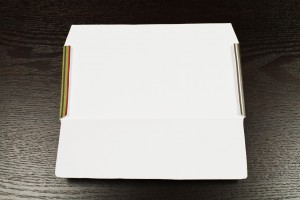
2. Fold the side flaps
A &
B in first, using your bone folder to make a sharp fold. If you don’t have a bone folder, you can use your nail to make the fold crisp.
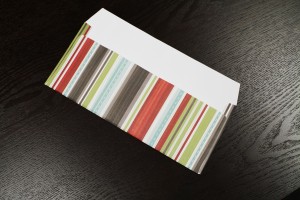
3. Run the glue stick on top of flaps
A &
B and fold flap
D (large, bottom flap) up, pressing to seal to side flaps. Alternately, you could use strips of double-sided tape for this step.

4. Fill with your handwritten letter. When you're ready to seal, fold the smaller remaining flap
C down and seal with glue, double-sided tape, a sticker, or use a return address label. Use a white label or a piece of colored paper taped to the front of the envelope to address. If you use colored paper, make sure your writing is clear and easy to read.
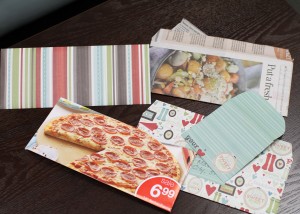
Making your own envelopes is so easy you’ll wonder why you never did it before.

For the newsprint example, I cut out the recipe that went with the image and sent it along with my letter. Bonus!
You need to
login to comment.