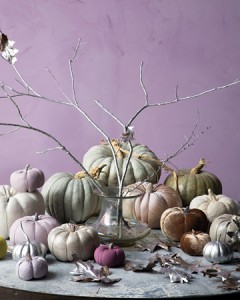
This month, it's all about pumpkins. I was searching the Internet for some great pumpkin-related crafts, when I found this one from Martha Stewart. DIY Fabric Pumpkins so easy even a beginning sewer can make them. And they look great! Of course they do--who does it better than Martha?
 DIY Fabric Pumpkin
Step 1
Cut out a fabric rectangle on the bias that's twice as long as it is wide. (We used 5-by-10-inch, 8-by-16-inch, and 11-by-22-inch pieces for our three pumpkin sizes.)
Step 2
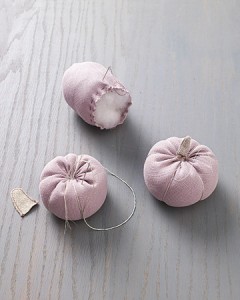
Fold rectangle, right side up, so short sides meet; stitch along that edge with 1/4-inch seam allowance. With doubled thread and running stitches, sew along 1 end; pull thread to cinch fabric closed, and stitch to secure.
 Step 3
Turn pouch right side out; stuff with batting. With doubled thread and running stitches, sew around open end; pull thread to cinch fabric, and stitch to secure.
Step 4
Thread long needle with floss. Wrap floss around pumpkin, pulling through the core several times, to add ridges.
Step 5
For stem, cut out 2 stem-size pieces of fabric. Stitch pieces, right sides facing, leaving base open. Turn right side out; stuff with batting. Secure open end to pumpkin with slip stitches.

Martha's website suggests making several fabric pumpkins out of different fabrics like linen, silk, and velvet. You could also upcycle old sweaters for fleecy pumpkins, or stash-bust your fabric scraps and have a really colorful pumpkin patch!
There's a cornucopia of fabulous fall sewing projects available on MarthaStewart.com. You can check them out
here.
1 Comments
You need to
login to comment.
-
Jennifer
•
12 years 199 days ago
I love this project! I think it would also make great custom pin cushions.