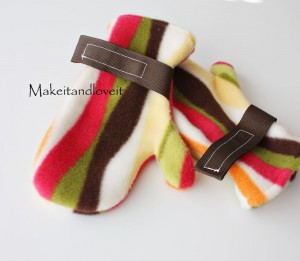
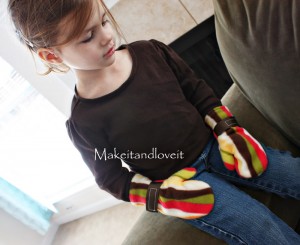
Needle artists, you know we love you! You're ready to make your mitten commitment, and we've got an adorable and easy pattern from
Make it and Love it for child-sized cozy fleece mittens to get you started!

What you need:
scrap fleece
ribbon
velcro
scissors
thread
sewing machine
1. Start by tracing your child's hand with fingers closed.
2. Use that as a guide as you draw a basic mitten shape, making sure to leave about 1/4 inch for a seam allowance along all of the sides, and about 1/2 – 3/4 of an inch along the bottom.
(Make sure that you are making the mittens wide enough, so that there is plenty of room to slide little hands in, and then you can just cinch it tight later.)
3. Cut out 2 pieces of fleece for both hands.
4. Then on the wrong side of bottom piece of each mitten, place a piece of thin elastic at the same level as the wrist. Sew a few stitches on one end of the elastic, attaching it to one edge of the mitten…. and then pull the elastic tight as you’re sewing across the mitten at wrist level. When you finish, the elastic will pull back into shape, and will gather your fleece a bit.
5. Now you’ll attach your ribbon adjustable strap to the top mitten piece. First, cut your ribbon about 1 1/5 inches wider than the base of the mitten, fold under the raw edge and then add about 2 inches of the soft side of the velcro to that end of the ribbon. (securing the folded under end of ribbon under the velcro.) Your finished ribbon piece will be about 1/4 inch wider than the base of the mitten. Then attach about an inch of the scratchy side of the velcro about a 1/2 inch away from the edge of the mitten, opposite the thumb side. (And at the same wrist level as the elastic on the other piece.) But you’ll sew it to the right side of the top mitten piece.
6. Then turn the ribbon strap over and pin it to the edge of the top mitten piece, right in line with the other velcro piece…..making sure it’s at wrist level.
7. Then place the bottom piece together with the top piece, with right sides together. Pin in place and sew all the way around the mitten (using whatever seam allowance you gave yourself when you cut out your pattern piece).
8. Zig-zag stitch around the entire mitten, to secure the seam.
9. The fold the the opening down a 1/4 inch/ then another 1/4 inch….then sew into place.
10. Now, turn right side out……and you’re done.

For step-by-step photos of this project, visit the Make it and Love it
page.
7 Comments
You need to
login to comment.
-
I don't even know how to run our sewing mhaicne (no, really, it's a vintage White, and I can't yet make it go consistently forwards with the treadle, so I'm just turning the wheel by hand), and I made one of these for my kindergartener! from fabric and ribbon she picked out! What a clever and clearly written pattern!
-
-
-
Marissa
•
12 years 174 days ago
Thanks Erin!
-
Erin
•
12 years 174 days ago
I love these mittens. I am going to come back when I have ink and print the directions and the pattern. I love this and think it's a great idea! Good job!
-
Marissa
•
12 years 179 days ago
Happy to help! :)
-
This is awesome thank you! Now that we live in a place where it snows, I think my girls will need a few of these..lol