OttLite Ambassador Tamara Kelly is this month's guest blogger. The creator of the crochet blog Moogly, Tamara shares with us a pattern to make a Crafty Hanging Can Cozy. A great way to upcycle old cans and also get organized for back to school, this pattern is simple and helps to brighten up your supplies! Take it away Tamara . . .
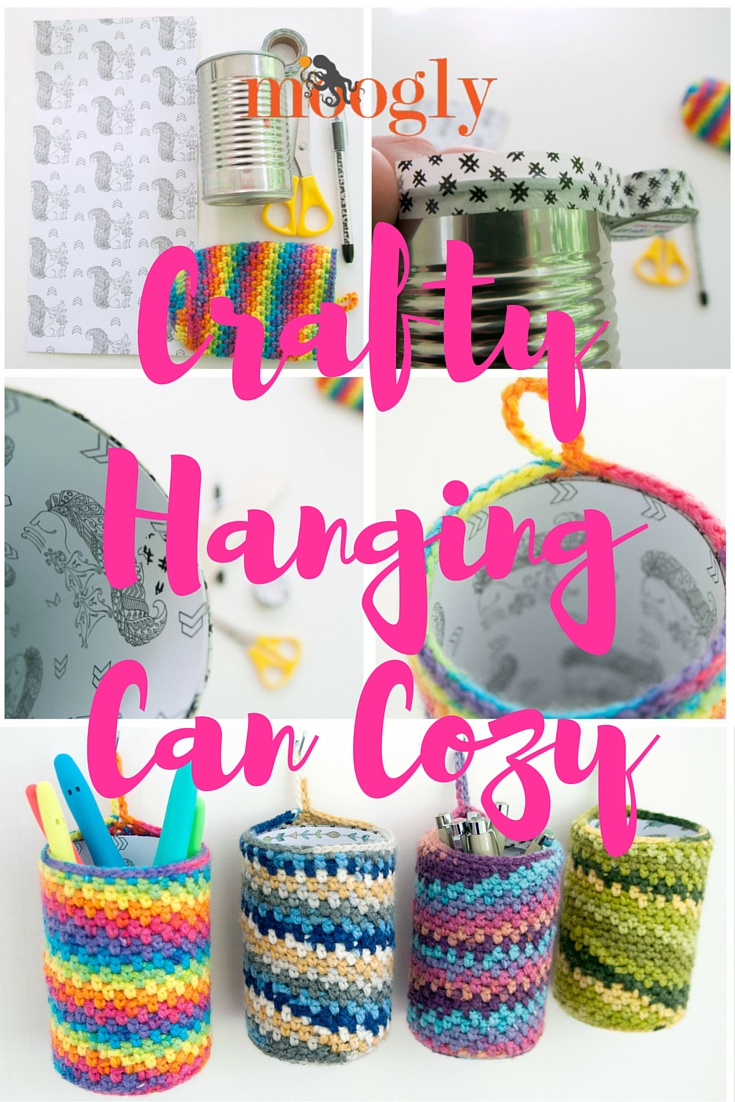
What have I been crafting under my OttLite? The Crafty Hanging Can Cozy! It's a fun craft that combines crochet, paper, washi tape, and recycling... and can help you get organized when it's done! Of course, it might take more than one for some of us!
Recycling is great - but reusing is better! And the Crafty Hanging Can Cozy takes "trash" and turns it into something pretty that's also pretty useful. Use it in the craft room to organize your pens, hooks, and other supplies, in the kitchen to store utensils, in the bathroom to hold makeup brushes, in the garage to hold nuts and bolts... the only limit is your imagination! With the handy loop to hang it up, it doesn't even take up any counter space!
And you'll want to use your OttLite for this pattern! The crochet stitch pattern used here is often referred to as the Moss Stitch, or sometimes as the Linen Stitch - fancy names for a simple stitch pattern of single crochets and chains. But the trick is to work into the chain spaces, and you'll need a bright clear light to see where they are - OttLite to the rescue!
Crafty Hanging Can Cozy
Materials Needed:
- US-G, 4mm hook
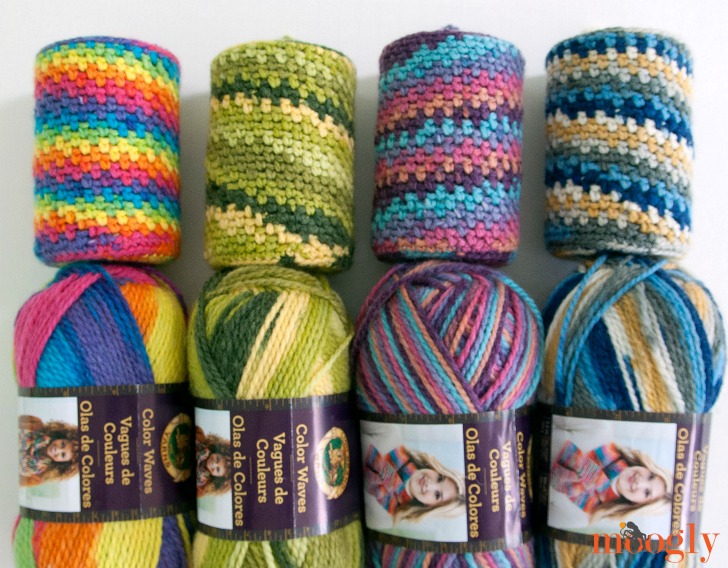
- 60 yds Lion Brand Color Waves (DK/yarn symbol "3"; 306 yds/280 m; 3.53 oz)
Colorways used (as shown above): Rainbow; Green Apple; Prairie Sunset; Twilight
- 14-16 oz empty food can (washed, label removed)
- Optional: Washi Tape/Decorative Duct Tape
- Optional: Cardstock/Paper 10" x 4 3/8"
- Gauge: Round 4 = 3" diameter
For video crochet tutorials, please visit www.mooglyblog.com
COZY INSTRUCTIONS:
Round 1: Make a magic circle, ch 2 (does not count as a st), dc 12 in the ring; join with sl st in 1st dc. (12 sts)
Round 2: Ch 2, 2 dc in each st around; join. (24 sts)
Round 3: Ch 2, dc in the 1st st, 2 dc in the next st, *dc in the next st, 2 dc in the next st; repeat from * around, join. (36 sts)
Round 4: Ch 1, 2 sc in the 1st st, sc in the next 2 sts, *2 sc in the next st, sc in the next 2 sts; repeat from * around, join. (48 sts)
Round 5: Ch 1, sc in blo (back loop only) of each st around; join. (48 sts)
Round 6: Ch 1, sc in 1st st, ch 1, skip next st, *sc in next st, ch 1, skip next st; repeat from * around, join. (24 sc, 24 ch)
Round 7 - 31: Sl st in next ch-1 sp, ch 1, sc in same ch-1 sp, ch 1, skip next st, *sc in next ch-1 sp, ch 1, skip next st; repeat from * around, join. (24 sc, 24 ch)
Round 32: Ch 12 (or to desired length for hanging loop), sl st in the same st as the join, sl st in each ch sp and st around; join and break yarn.
ASSEMBLY INSTRUCTIONS:
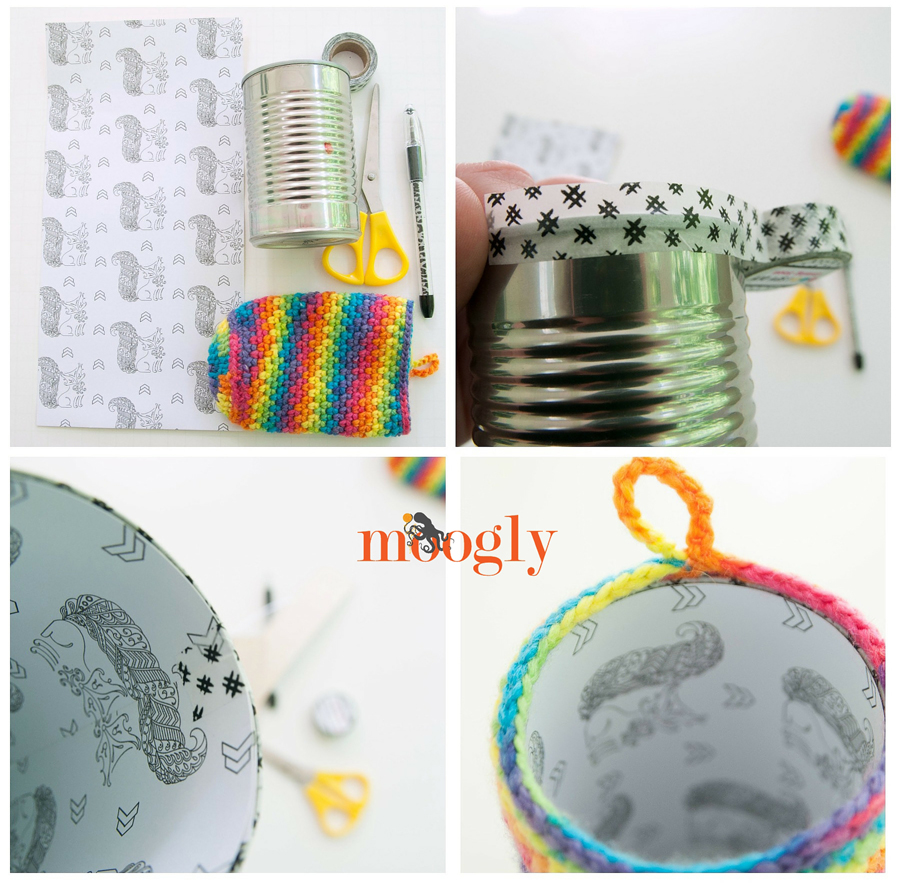
Step 1: If there are any sharp edges in the can, use a pair of pliers to squish them down flat. Then cover the top lip of the can with decorative tape.
Step 2: Insert the paper inside the can as a lining, secure with tape if desired.
Step 3: Insert the can in the crocheted cozy. Then hang and fill!
Written pattern and photos copyright Tamara Kelly 2016, all rights reserved. Shared on OttLite.com with permission.
You need to
login to comment.